
Installing the certificate on your iOS device
(iPhone, iPad, iPod Touch, etc.)
Installing the certificate on your iOS device is quick and simple. You may want to read all the instructions beforehand, to familiarize yourself with the process. We recommend you print these instructions as well, so you have a reference to look at while installing.
- Click on the download link at the bottom of the page.

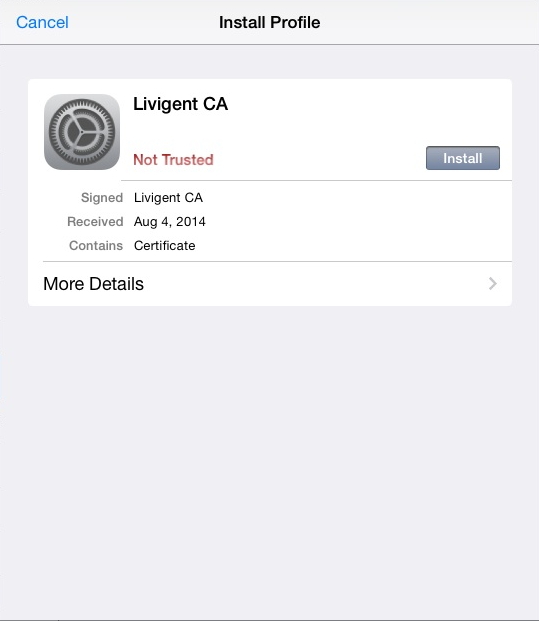
- The following window will open:
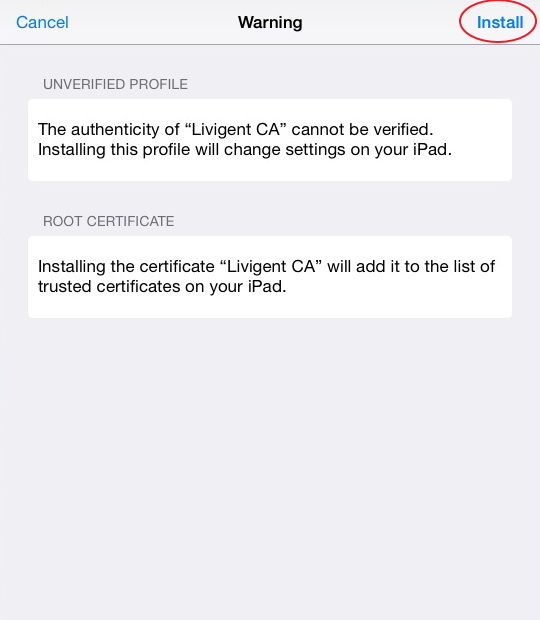
Click on the button. - A warning window will open. Click on
- The certificate will be installed, and the confirmation screen will appear. Click on to close the window and return to the browser.
- Your device is now Jnet SSL compliant.
 button.
 to close the window and return to the browser.
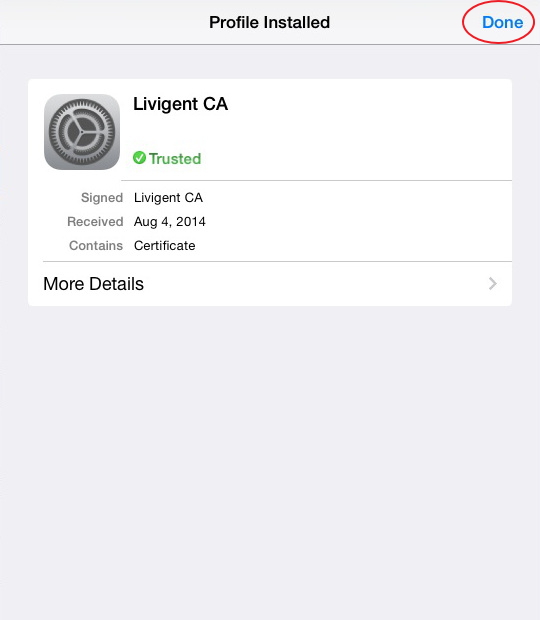
NOTE:
In iOS 10.3 and later,You must manually turn on trust for thejnet certificate.

- go to Settings > General > About > Certificate Trust Settings.
- Under “Enable full trust for root certificates,” turn on trust for the certificate.
- Tap on Wi-Fi to access proxy settings and tap the name of your Wi-Fi network
- tap on manual under HTTP, proxy and set the proxy to proxy.thejnet.com. the port is 8080


Click HERE to download the certificate.
Click HERE to download the certificate.